| Entrance | Mainstreet | Wiki | Register |
|
# of watchers: 7
|
Fans: 0
| D20: 10 |
| Wiki-page rating |  Stumble! Stumble! |
| Informative: | 20 |
| Artistic: | 0 |
| Funny-rating: | 0 |
| Friendly: | 0 |

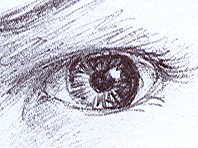
 Before we start: It really helps if you think about the 3d shape behind what you're drawing, and the structure. That's what references and anatomy books are great for. You can learn to repeat step-by-step tutorials of course, but they are mostly meant to illustrate application of various principles and techniques, not as ways cast in stone that you must follow. They're just a basic carcas for you to build your own ideas around. :) 1. Draw the basic shape of the eye. Note, how the inner corner (the one closer to the nose) is lower than the outer corner. Also keep the eye somewhat roundish, but not like a circle. Remember that the eye is a ball in the socket of the skull, and the eyelids are flexible tissues at the surface of this ball. 2. Deciding where the pupil will be. Sort of basic. Making some tiny adjustments to the outline, and marking where the eye ends at the inner corner. There's that red tissue at that place, we'll touch it up a bit later. Notice, how making this line at the inner corner curved helps to define the roundness of the eyeball. 3. Now it's getting more interesting. The arrow marks the direction of light (I picked a random one in this case). Now, note that the pupil part is like a water droplet on the eyeball - if you look at anatomy books or reference, or just look at someone sideways while they're staring at something, you'll see how it protrudes a bit from the eyeball's round surface. 4. Now we proceed to shade the eyeball itself. Shading the white part of the eye is often omitted, and causes flatness. When you shade, make sure that you figure out where those shadows are coming from, and don't just put them evenly all around. In this case, the upper eyelid is the main cause of shadow at the top and to the right, and the curved surface of the eyeball causes the less concentrated shadow at the bottom and to the left. 5. This is the final stage for this tutorial, although normally I'd be taking it further and refining it a whole lot. What happens here is mostly 'refinement', and shading of eyelids. Notice, how in 4. a small white speck appeared at the outer edge of the pupil. It is not a smudge, but a reflection. In 5., I've made this reflection brighter. I often put some at the edge of the pupil to show that the pupil shares the surface with the eyeball and they're both glistening with moisture. It makes the eye look rounder, more three-dimensio
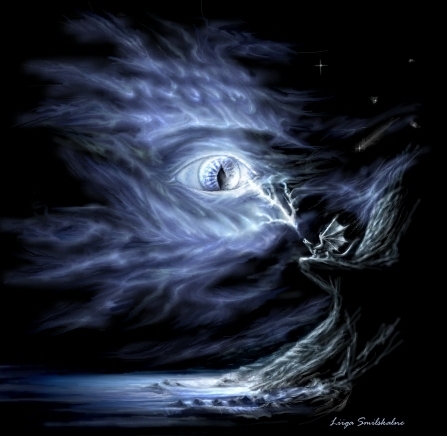
2004-11-17 [cassiekate14]: Love Your Art Work
2004-11-17 [liiga]: Thanks, Cassie! ^_^
2005-05-19 [Shiorysm]: you are a great artist!!!! i love your work!!!
2005-05-19 [liiga]: Thanks! :)
2005-07-11 [Oht'cobidan]: what digital art program do you use?
2005-07-11 [liiga]: quoting right from the tutorial itself: This eye was drawn using a Trust tablet, and Corel Painter, the brush i used is Wet Detail brush 5 from Acrylics. It's not special in any way, I use it 'cause it's smooth and smudgy. Smudgyness can be adjusted or just carried out with airbrush or smudge tool. And since I've heard this one before too many times: it's not about the tablet. ;)
2005-08-23 [The Alchemist]: this is a pic i made myself, vieuw it here: http://elfwood
2005-08-26 [liiga]: Very pretty, [The Alchemist]. :)
2005-11-23 [Jöntex]: Thanks SO much!! :D now I can draw good eyes! :)
2006-09-14 [Hedda]: [liiga], see [398395]. I hope you don't mind that I'm to lazy to message you first.
2007-01-04 [Hedda]: I just added a title to the image, so I might be easier to find.
| Show these comments on your site |
|
Elftown - Wiki, forums, community and friendship.
|